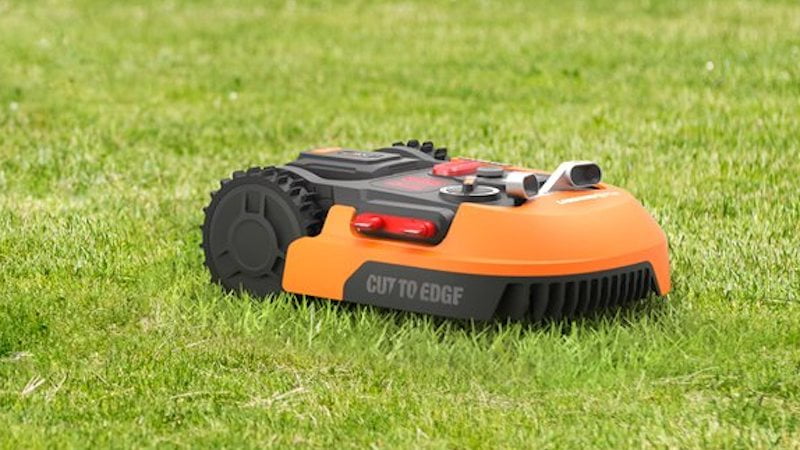
The WORX Landroid M500 Plus is a powerful robot lawn mower designed for gardens up to 500 square meters. With many functions and a user-friendly design, it promises efficient and effortless lawn care. We tested the WORX Landroid M500 Plus ourselves and will show you how the robotic lawnmower really performs.
The WORX Landroid M500 Plus is a mid-priced robotic lawnmower that is ideal for medium-sized gardens. With intelligent functions such as adjustable cutting height, edge trimming and planning function, it ensures a well-groomed lawn with little effort.
WORX Landroid M500 Plus review
We have tested the robotic lawnmower ourselves for several months and will show you below whether the many functions really live up to what the provider promises in practice.
Technical specifications
First, let’s look at the specifications of the WORX Landroid M500 Plus:
- Cutting width: 18 cm
- Maximum area coverage: 500 m²
- Maximum incline: 35 percent
- Battery capacity: 20V/2.0Ah
- Charging time: about 90 minutes
- Mowing time per charge: approx. 100 minutes
- Volume: about 60dB
Delivery and perimeter wire
You get the powerful robot lawn mower from WORX together with the following accessories: the charging station, the perimeter wire, the fastening nails, the blades and screws, the power supply and the operating instructions. Before you can install the robotic lawnmower, you need to lay the perimeter wire. We have decided to lay the wire using the fastening nails.
To do this, you first determine in which areas the robotic lawnmower should drive. The perimeter wire is laid along the edges of the lawn and fastened to the ground with the fastening nails. The wire acts as a guidance system to keep the robotic lawnmower within the desired area, excluding certain areas such as flower beds or sidewalks.
The cut-to-edge function (Image: WORX)
Once the wire is laid, the robotic lawnmower can recognize the boundary and adjust its route accordingly. A helpful template is included in the scope of delivery, which you can also use to lay inside corners quickly and easily so that the robotic lawnmower has no problems mowing later.
Installation
As soon as the boundary wire has been laid in the garden, the actual installation of the robotic lawnmower begins. To do this, connect the charging station to a power source and connect the robotic lawnmower to the charging station. Here you should make sure that the robotic lawnmower is aligned correctly and that the charging contacts fit properly on the contacts of the charging station.
When the robotic lawnmower is connected, adjust the settings and functions according to the user manual. This includes the desired cutting height, the planning function and any special functions such as edge cutting. In a test run, you then check that the WORX Landroid M500 Plus works, mows the desired areas and that it returns to the charging station without any problems.
features and benefits
The WORX Landroid M500 Plus impresses with a number of functions and advantages:
- cutting height: With the WORX Landroid M500 Plus, an adjustable cutting height between 30 and 60 mm is possible. You can easily adjust the cutting height with the rotary wheel on the robotic lawnmower.
- Cut-to-Edge Funktion: Thanks to the side mower, the WORX Landroid M500 Plus is able to cut the lawn edges precisely. If you have laid the perimeter wire correctly, there will be almost no lawn left in the end.
- Floating mower: The robotic lawnmower has a floating mower. This also adapts to uneven terrain. This avoids steps and bumps and gives the lawn a more even appearance.
- volume: With a noise level of around 60 dB, the WORX Landroid M500 Plus is comparatively quiet during operation. This allows quiet use in the garden without disturbing the neighbors or your own peace.
- Planning: With the planning function, you determine when the WORX Landroid M500 Plus should automatically start mowing the lawn. You simply set the exact times and days. This gives you maximum flexibility, even if you are not at home.
- Security: A security system is built into the robotic lawnmower to prevent objects in your garden from being damaged. There is also built-in anti-theft protection. When the robotic lawnmower is picked up, an alarm goes off immediately and only stops when a code is entered.
- Cleaning: The WORX Landroid M500 Plus is not only waterproof on top, but also on the bottom. That means you can simply clean the robotic lawnmower with the water hose.

The floating mower (Image: WORX)
WORX Landroid M500 Plus in practical testing
It took us less than an hour to install and lay the perimeter wire. Considering that we did this for the first time, we were pleasantly surprised by the short time. The robotic lawnmower has been running according to plan since it was installed.
With the associated app, we were also able to start the robotic lawnmower manually and received immediate notifications when the robotic lawnmower got stuck. Unfortunately, the app could not find a connection to the robotic lawnmower directly a few times, even when we were right next to it. The app should at best be improved by the manufacturer to make the experience even more positive.
Even when faced with challenges, the WORX system did not disappoint. We had to move the boundary wire after a few months. Instead of laying the whole wire again, we connected the two ends of the wire to each other with suitable connecting parts, which you can buy for a few euros.
The WORX Landroid M500 Plus currently costs 698 euros. Compared to other robotic lawnmowers, which are also designed for 500 square meters, the robotic lawnmower from WORX is in the lower price segment. But that doesn’t change the quality, which completely convinced us.
This post contains affiliate links for which we receive a small commission. However, this has no influence on the content of our contributions.
Also interesting:
Source: https://www.basicthinking.de/blog/2023/06/15/worx-landroid-m500-plus-test/


